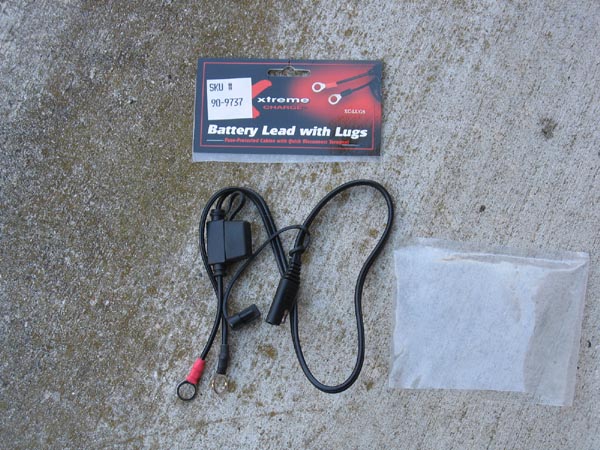
Harley Davidson Sportster 2005 883 XLC Battery Replacement

Harley is very proud of the design effort that goes into their motorcycles.  This is probably true of everything except the Sportster Battery Replacement.  One would have to be an idiot to be proud of how difficult it is to perform the maintenance action of replacing the battery.
 
While speaking with Sportster owners, the Sportster battery replacement continues to be difficult throughout the years.  One more inch of the negative cable would be a great design improvement.


I figured my experience might help others.

I also added a fused battery connector so that I can easily connect a battery tender to a two conductor automotive SAE power connector and in the future add a cigarette lighter that will aid in adding a GPS unit or automotive phone charger to the Sporty.


fused_battery_lead
In addition to replacing the Battery, I attached a fused (7.5 amp) battery connector for both battery charging access and to add a cigarette lighter in the near future.

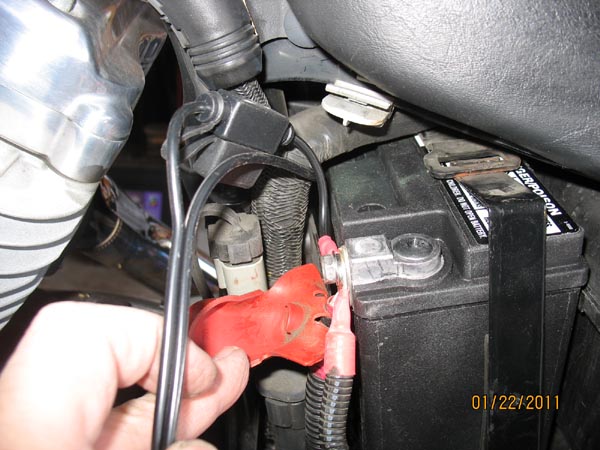
The RED lead (circular lug) will be connected to the + lead on the battery.

The BLACK lead (circular lug) will be connected to the - lead on the battery.
remove_batt_coverTo remove the battery cover, use a flat screwdriver to lift the grey tabs between the seat and the top of the battery cover.

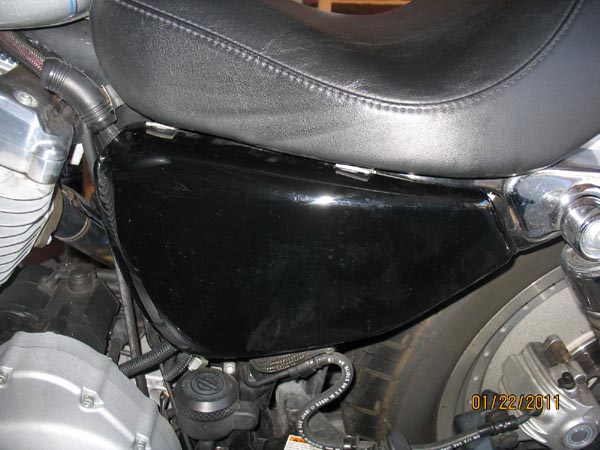
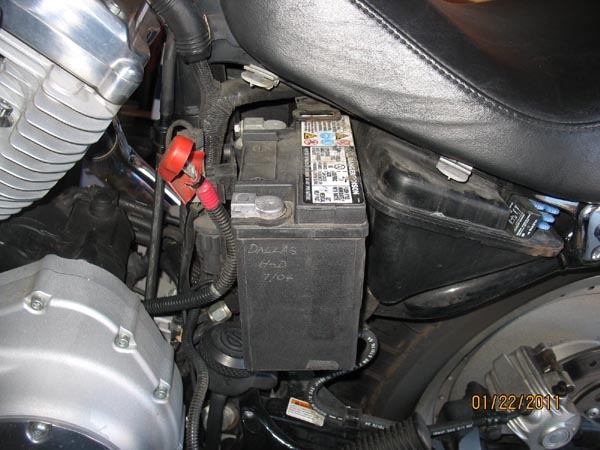
Pull out the battery cover from the top and then lift the bottom off of the metal tab.
remove_main_fuseTo move the Main Fuse from the battery retaining strap, slide it to the right and then pull toward you.
remove_main_fuseTo remove the battery retaining strap, remove the bolt that is under the battery.

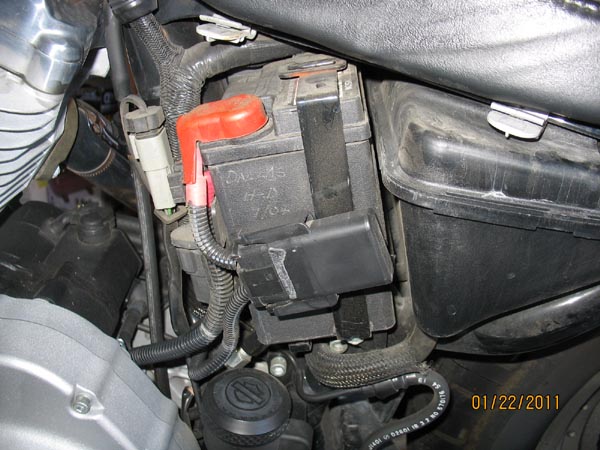
After the bolt is removed, lift the strap up and disengage the top of the strap.
remove_leadsSome instructions say to disconnect the negative lead from the engine case.  This is a real pain and is not necessary if caution is used - just like the professionals do.

Now the strap is out of the way and the battery can be partially pulled out.

Caution!!!!  Be sure the wrench or screwdriver used to remove the positive lead does not come in contact with the motorcycle frame (or other metal parts)!!!!!!!

Remove the positive leads.  A 10 mm metric wrench works well.  
remove_battAfter removing the positive lead, pull the battery toward you.  There will be just enough cable attached to the negative lead to allow you to remove the bolt so that the battery can be completely removed.

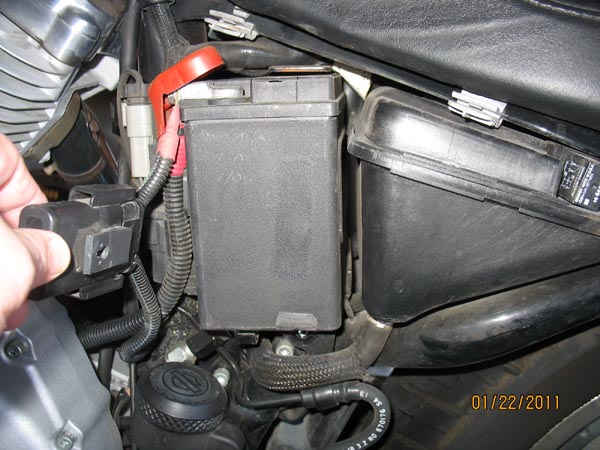
Again, a 10mm metric wrench works well.  (I know that  Harley is American made but apparently the battery is not)

There is no issue with the negative terminal touching the motorcycle frame.
connect_leadsAttach the heviest cable to the battery first and stack the lighter cables away from the battery terminal.

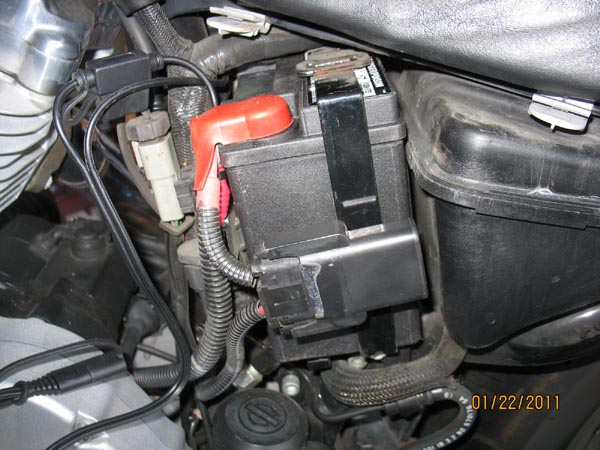
Now the fused battery lead and motorcycle cables have been attached to the battery and the battery has been pushed back into its compartment.  

The battery needs to be pushed completely into its holder so that the battery retaining strap and cover can be replaced.

Hook the battery retaining strap at the top and then replace the bolt at the bottom of the strap.
add_bandNow the new battery has been replaced in the holder and its retaining strap is bolted at the bottom.

The next step is to replace the main fuse holder to the battery retaining strap.
add_main_fuseTo replace the main fuse holder, slide the holder's key hole over the pin on the battery strap and slide it to the left to lock in place.
cable_tiesSome cable ties are needed to attach the new fused cable to the motorcycle.
add_tiesThe black cable ties are shown to connect the new fused lead to the existing wires without interfeering with any other operation.
trim_tiesThe excess from the cable ties is cut off.
replace_coverTo replace the battery cover, anchor the bottom and slide the slots in the top of the battery cover into the grey plastic tabs.

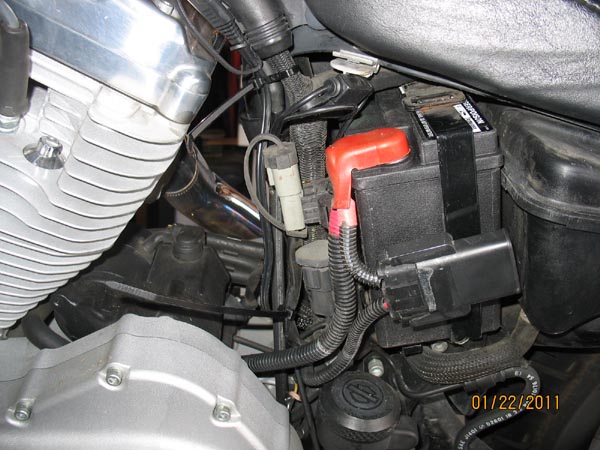
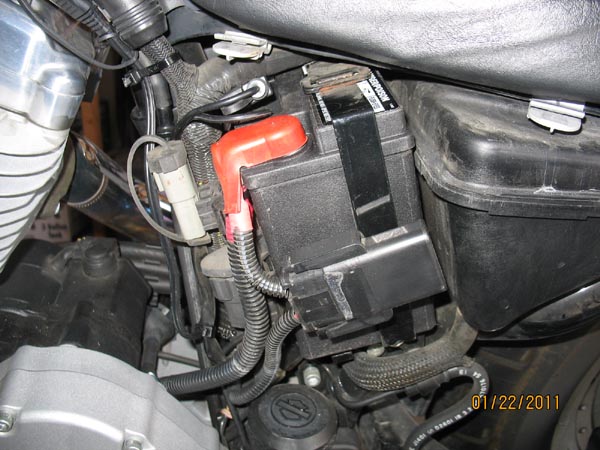
Ensure the battery cover is securly attached to the motorcycle.